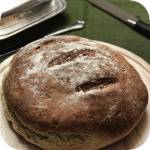
We all know delicious pita breads, which freshly made and still warm, are a fantastic addition to many dishes. Although usually associated mainly with Arabic cuisine, it is quite often also found in Greece. The easiest way to find them is in places where street food is sold. Pita bread is especially popular as an addition to gyros, or falafels known in Greece under the name Revithokeftedes.
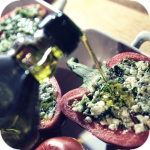
Some Greeks use pita also as a basis for preparing various types of vegetable snacks, additions to salads or for the administration of fava, hummus and melitzanosalata pastes.
Using the proven recipe is one of the basic factors determining whether you can prepare good pita breads. We've been testing the different ways we can find online and cookbooks for quite a while before we found the most reliable and reliable one. The following recipe with very good effects, we have been using for a good few years. Despite the fact that it is time-consuming and labor-intensive, however, you can count on almost a hundred percent certainty that prepared bread will have a large pocket and a thin wall.
1. Preparing the dough for pita should begin the day before starting with the preparation of leaven.
In a fairly large bowl, mix the water and yeast, and then gradually add the flour. The whole is mixed with a wooden spoon until the ingredients combine into a smooth but liquid mass, the density of which will be slightly larger than the dough for pancakes. We cover the bowl tightly with food foil and leave it in a cool place for about 12-14 hours.
2. During this period, it is worth checking the bowl once in a while to see if the yeast is working. If it happens that you use too warm water, the yeast may not grow, and all leaven will be poured. Therefore, it is worth checking this earlier.
3. On the second day (after 12-14 hours), add the remaining ingredients of the proper dough to the bowl with the leaven: salt, oil and flour. We add the last one in small portions, so that no lumps are formed in the kneaded dough.
4. Form the resulting mass for 8-10 minutes, until a smooth dough is obtained, and then place them in a large bowl previously oiled with olive oil. We cover the dish with a cloth and leave it for two to four hours, so that the dough will increase its volume 2-3 times.
5. Put the leavened dough onto the pastry board, sprinkled with flour, then knead them so as to get rid of the air. The dough tolerates good storage in the fridge, so some of it can be used after a few days.
6. Divide the finished dough into 15-16 small parts, from which we form balls, which in the end we cover with a cloth and leave to rise for about 15-30 minutes.
7. After this time, roll each ball to a small flat cake. It is not allowed to arrange rolled out cakes on yourself. So it is worth planning the work in such a way that when one pita is fried, roll the next portion quickly.
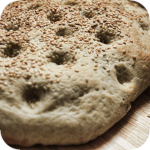
8. The method of frying determines whether pockets form in the pits. Dry the frying pan very strongly. It is worth sprinkling it with a bit of flour and observing its color. When the flour starts to brown or smoke, we can start frying bread.

9. After placing the cake on a hot pan, the first side is baked for about 12-15 seconds. After this time, the cake is turned over, then fry for about a minute, constantly watching the cake. If, during this period, the cake is not "willing" to grow or does it too lazy, we turn it over again. However, if it begins to puff up, we keep them until the whole is filled with air and only then we turn over and bake for the next several seconds.
10. If the patties are too fast, then the fire should be slightly reduced, but remember that the pan is still hot enough.
11. The correct execution of pita bread requires a bit of patience and a bit of practice, so if the first bread is not filled with air, do not be put off too quickly, but try to take effect. After getting the right practice you will know if the pan is hot enough and when exactly the cake needs to be turned over.


Komentarze
komentarz z
??? Revitokeftedes to kotleciki z cieciorki- czy naprawdę to danie jest takie popularne w Grecji- ja nigdy nie jadłam w greckim fast foodzie.Pitty z fotografii nie mają nic wspólnego z pittą arabską z kieszonką. Ciasto jest zagniatane z olejem ,placki są mniejsze, nie nadziewa się ich-tylko okręca nadzienie--polecam.Na Krecie do girosa z pittą dodaje się jogurt ,a nie tzatzyki jak w innych częściach Krety
komentarz z
Książki kucharskie i internet są pełne przepisów na chlebki pita. Zachęcamy do znalezienia swojego ulubionego.
komentarz z
Pysznee:p
komentarz z
Ja mieszkam na stałe w Grecji- teraz na Krecie ponad 20 lat i pewnie o tych pittach wystarczająco wiem bez książek kucharskich
komentarz z
W takim razie tylko pozazdrościć :>
Wypełnij poniższy formularz aby dodać komentarz
lub kliknij w poniższy link aby skorzystać z możliwosci komentowania przez facebooka:
https://www.facebook.com/crete.poland/posts/10152789661427551